


When rain starts pouring through your ceiling after a storm, every minute matters. A compromised roof can turn a manageable repair into a full-blown structural crisis within hours, especially in North Carolina where severe weather can bring heavy rain, hail, and high winds all in a single afternoon. This guide walks you through the exact steps to protect your home right now, from safely assessing the damage to installing a temporary tarp and avoiding the mistakes that cost homeowners thousands of dollars more than necessary.
Table of Contents
- Assessing storm damage and immediate safety steps
- Tools and materials checklist for emergency roof repairs
- Step-by-step guide: Emergency tarp installation (DIY or pro)
- Common mistakes and how to avoid them during emergency fixes
- The truth about emergency roof repairs pros never tell you
- Get professional help fast for lasting roof repairs
- Frequently asked questions
Key Takeaways
| Point | Details |
|---|---|
| Safety comes first | Never climb onto a damaged roof if there’s ongoing danger—safety is priority over temporary fixes. |
| Use proper materials | Always choose a thick blue poly tarp and secure it with 2×4 boards for the best storm protection. |
| Emergency tarps are temporary | Tarping buys crucial time but must be followed by professional roof repairs within 90 days. |
| Mistakes cause lasting damage | Nailing into undamaged roof areas or undersized tarps can make problems much worse. |
| Prompt action supports insurance claims | Fast response limits damage and helps with your storm damage insurance claim process. |
Assessing storm damage and immediate safety steps
Having previewed the need for quick decisions after a storm, it’s vital to assess the damage and prioritize safety before starting any roof repair steps. Rushing onto a wet, unstable roof is one of the most dangerous decisions you can make. Take a breath, stay grounded, and work through this process methodically.
Start with a visual inspection from inside and outside your home. Look for these warning signs:
- Missing or shifted shingles visible from the ground
- Daylight showing through your attic boards or ceiling
- Water stains spreading across your ceiling or walls
- Pooled water in your attic or on upper floors
- Sagging sections in the roof deck or ceiling
- Debris impact zones where branches or hail struck
Once you spot the damage, your first moves should focus on safety, not repairs. Turn off electrical breakers near any rooms where water is actively dripping. Standing water and live wiring are a life-threatening combination. If you see downed power lines touching your roof or yard, call emergency services immediately and keep everyone away from the area.
“Immediate temporary protection via tarping is essential to prevent water intrusion, mold, and structural damage after storm damage.” You can read more about this in the emergency roof tarp guidance from East Coast Roofing Guide.
Do not attempt to climb your roof during a storm, at night, or if you notice any sagging structure. The roof may look intact from below but be severely weakened. For ongoing emergency roof tips specific to North Carolina weather events, it helps to stay informed before the next storm hits. You can also reference our full guide on detecting roof storm damage for a visual checklist of what to look for after high wind or hail events.
If a tree has struck your home or you see widespread structural collapse, call 911 or your local fire department before anything else. Your safety is the priority.
Tools and materials checklist for emergency roof repairs
Once the area is safe and you’ve identified damage zones, you’ll need the right tools and materials to quickly secure the breach. Having these ready before storm season arrives gives you a real advantage.
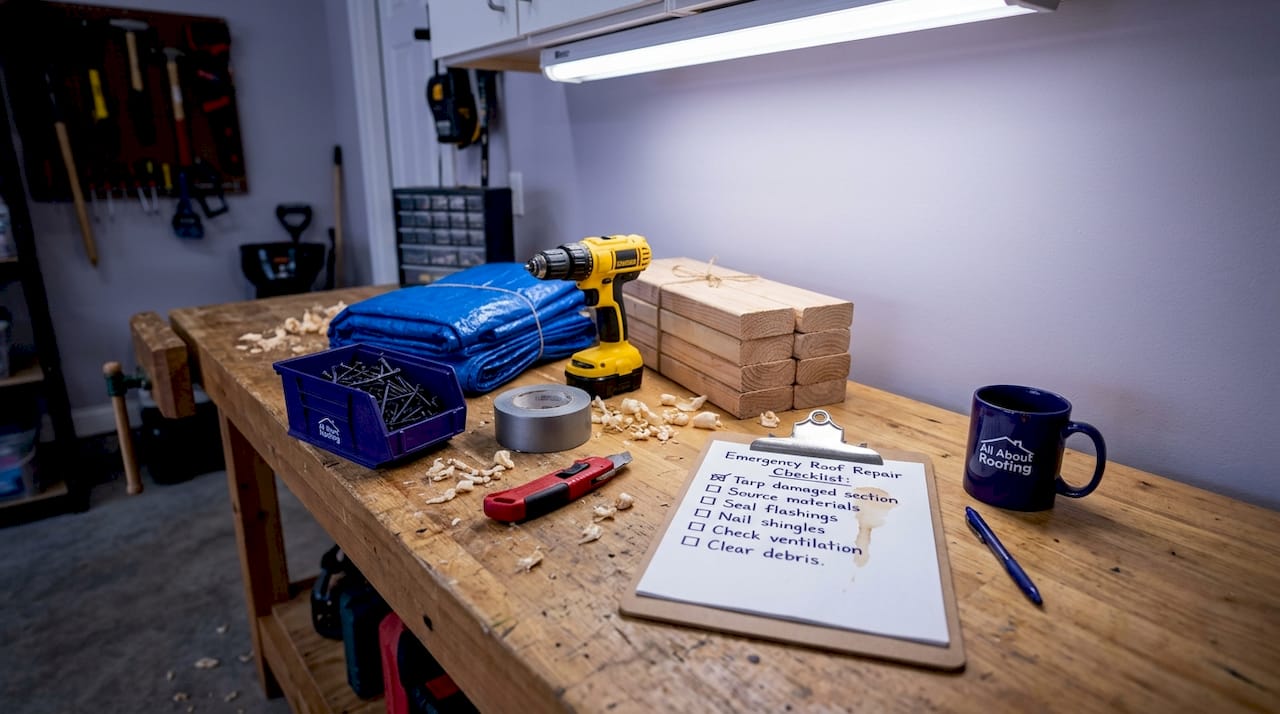
Here’s a quick reference table for what you’ll need:
| Item | Purpose | Priority |
|---|---|---|
| Heavy-duty blue poly tarp (6-12 mil) | Primary waterproof cover | Essential |
| 2×4 lumber boards | Secure tarp edges without nails | Essential |
| Cordless drill and screws | Attach boards to roof deck | Essential |
| Work gloves and safety goggles | Personal protection | Essential |
| Sturdy extension ladder | Safe roof access | Essential |
| Roofing cement | Seal small cracks or gaps | Recommended |
| Sandbags | Extra tarp weight in high winds | Optional |
| Duct tape | Temporary sealing for minor tears | Optional |
| Bucket and towels | Indoor water collection | Recommended |
Not all tarps are created equal. In North Carolina, you get unpredictable weather: a sunny morning can turn into a thunderstorm by afternoon. A flimsy 2-mil tarp will shred in moderate winds and leave you worse off than before. Go with a heavy-duty 6-12 mil poly tarp that extends at least 4 feet beyond the damaged area in every direction, and secure it with 2×4 lumber boards rolled into the edges and screwed into the roof deck, prioritizing the top edge closest to the ridge.
For recommended products and professional-grade options, our roof repair recommendations page has additional guidance on materials suited for local conditions.
Pro Tip: Pre-cut your 2×4 boards to 8-foot lengths before storm season and store them in your garage with the rest of your emergency kit. You’ll save critical time when every minute counts after a bad storm.
Step-by-step guide: Emergency tarp installation (DIY or pro)
Armed with the right gear, the next step is covering the damage to immediately protect your home until professional repairs are possible. Here’s exactly how to do it safely and effectively.
- Check current weather. Only proceed if the storm has completely passed, it’s daylight, and no rain or high winds are in the forecast for the next several hours.
- Gather all materials before climbing. Make every trip count. Going up and down a ladder repeatedly increases your fall risk.
- Position your tarp so it covers the entire damaged area plus at least 4 feet in every direction, with the top edge running up and over the roof ridge if possible.
- Roll your 2×4 boards into the tarp edges. Fold the tarp around each board, creating a sandwich, so the board anchors the tarp without driving nails into the undamaged roof surface.
- Drill screws through the boards and into the roof deck. Start with the top edge (closest to the ridge) to prevent water from running under the tarp. Work your way down and across.
- Check all corners and edges for gaps. Wind can get under even a small opening and tear the entire tarp loose within hours.
Here’s a comparison to help you decide whether to handle it yourself or call a professional team:
| Factor | DIY tarping | Professional tarping |
|---|---|---|
| Speed | 1-3 hours depending on experience | Often same-day |
| Cost | Low material cost | Moderate service fee |
| Safety | Risk if roof is unstable | Trained crew with safety gear |
| Insurance documentation | Limited | Full photo documentation |
| Tarp quality and fit | Varies by skill | Professional-grade materials |
| Liability | Homeowner’s responsibility | Covered by contractor |
The sandwich method for securing boards is the most important takeaway here. It minimizes new holes in intact roof sections while still anchoring the tarp firmly. If you aren’t confident in your ability to safely access and navigate the roof, calling a professional is absolutely the right call. Understand more about why delaying protection can damage your home’s value by reading about why repair roof leaks matters beyond just stopping the drip.
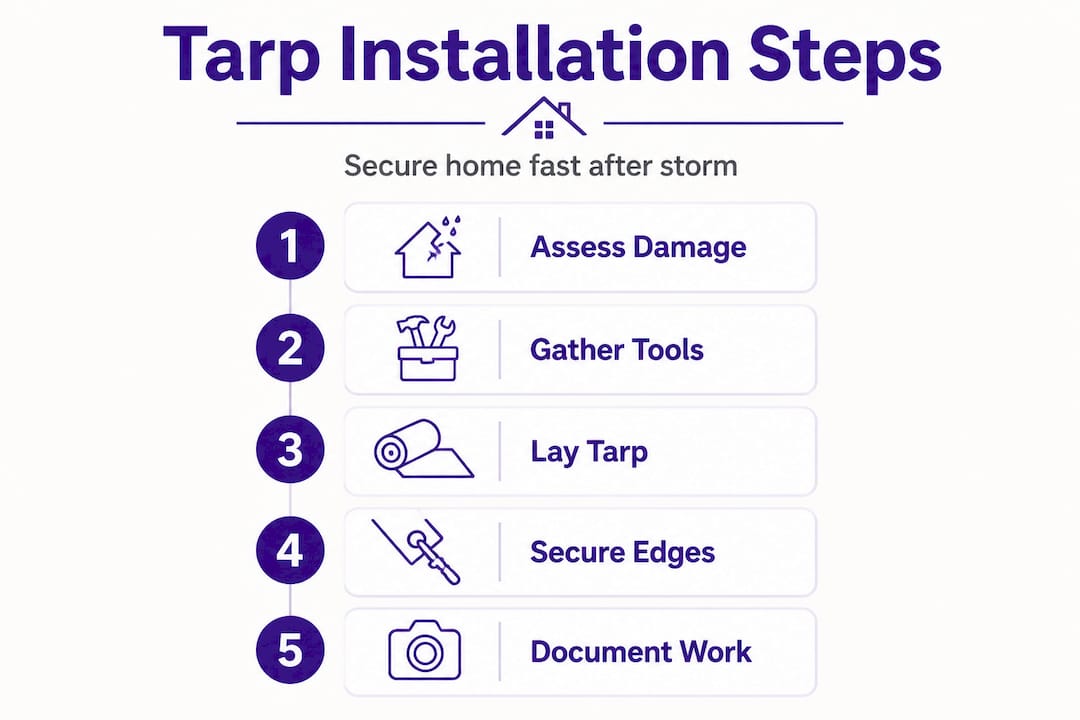
Pro Tip: If you hire a professional for emergency tarping, ask them to take dated photos of both the damage and the completed tarp installation. These photos become critical evidence when filing your insurance claim.
Common mistakes and how to avoid them during emergency fixes
With the tarp in place, it’s important to know what can go wrong and how to sidestep issues that might cost you more in the long run. Even a well-intentioned repair can create new problems if these details are overlooked.
Here are the most common mistakes North Carolina homeowners make during emergency roof fixes:
- Using an undersized tarp. A tarp that barely covers the visible damage will let water in around the edges. Always go larger than you think you need.
- Nailing directly into undamaged shingles. Every nail hole you add to an intact roof section is a potential future leak. The sandwich board method exists for a reason. As the guidance states, tarp lasts 30-90 days at most, and new nail holes will outlast your temporary fix.
- Skipping the top edge. If you only secure the sides and bottom of a tarp, wind-driven rain will force water under the top opening. The top edge must be secured first and most firmly.
- Not extending the tarp far enough. Four feet beyond visible damage is the minimum. If you can see a cracked shingle at the edge of your inspection, the actual damage may extend further underneath.
- Forgetting to check the tarp regularly. Wind and rain will work against your installation every single day. Inspect tarp edges every 2 to 3 days for signs of lifting, tearing, or pooled water weight.
Temporary tarps are not a long-term fix. Waiting longer than 90 days without professional repair can result in mold growth, rotting decking, and denied insurance claims. Schedule your permanent repair within days, not weeks.
One honest reality many homeowners face: they put up a tarp after a storm and then feel the urgency pass once the immediate leak stops. Life gets busy. Before you realize it, two months have gone by and that tarp is fraying at the edges while moisture quietly damages your decking underneath. Don’t let short-term relief become long-term regret. If you have roofing questions about what to do next or what signs indicate bigger problems, our roofing FAQ covers the most common concerns we hear from homeowners across Burlington, Greensboro, and surrounding areas.
Pro Tip: Set a calendar reminder for 2 weeks after installing your tarp. That’s your check-in date to either inspect the tarp condition or confirm your professional repair appointment is scheduled.
The truth about emergency roof repairs pros never tell you
Here’s something we’ve learned after years of working with North Carolina homeowners following storms: the biggest damage often isn’t from the storm itself. It’s from the delay after the storm.
Homeowners sometimes feel a sense of confidence once a tarp is up. The visible drip has stopped. The ceiling looks dry. The instinct is to wait and see. That confidence is the most expensive mistake you can make. What you can’t see is the moisture that’s already working its way into your insulation, your attic framing, and eventually your drywall. Mold can begin developing within 24 to 48 hours of water intrusion. By the time you see a stain or smell something off, the remediation cost has grown far beyond a simple roof repair.
There’s another truth worth stating plainly. Insurance companies pay close attention to documentation. A professionally performed tarp with dated photos, a damage assessment report, and a licensed contractor’s signature carries far more weight than photos from your phone and a Home Depot receipt. When we respond to storm damage calls, we document everything because we know your claim depends on it. DIY tarping absolutely has its place for small, safely accessible damage, but relying on it as a substitute for professional documentation can genuinely reduce your claim payout.
DIY works for small, accessible repairs when you can safely reach the damage and the structural integrity of the roof is not in question. But it should never tempt you into taking risks on a wet, steep, or structurally compromised surface. No repair is worth a fall.
The costliest thing we see isn’t the storm damage itself. It’s the homeowner who waited two months before calling us, thinking the tarp was holding everything together, only to find that the decking underneath had rotted and the repair cost had tripled. Prompt action with expert help after storm damage is genuinely the most cost-effective decision you can make.
Get professional help fast for lasting roof repairs
Tarping is a smart and necessary first response, but it’s only the beginning of protecting your home after storm damage.
At All About Roofing Co., LLC, we provide fast, reliable roof repair services for homeowners across Burlington, Greensboro, Mebane, Chapel Hill, and all surrounding communities. Our experienced team responds quickly after storms, documents damage thoroughly for your insurance claim, and gets your roof properly repaired so you’re not living under a tarp for weeks on end. We also offer professional storm damage solutions tailored to North Carolina weather conditions, along with thorough roof inspections to catch hidden damage before it becomes a bigger problem. Schedule your roof inspection appointment today and let us give you a clear picture of what your roof needs. Call us for a free estimate and get the peace of mind you deserve.
Frequently asked questions
How long will an emergency roof tarp last?
A properly installed roof tarp provides temporary protection for 30-90 days, but prompt permanent repairs are essential to prevent mold and structural damage from developing underneath.
Can I walk on my roof to place a tarp after a storm?
You should only attempt tarp installation if the roof is stable, dry, and safely accessible. Avoid getting on the roof if you notice sagging areas, electrical risks, or significant structural damage from a tree strike or impact.
What kind of tarp should I use for emergency repairs?
Use a heavy-duty 6-12 mil blue poly tarp that extends at least 4 feet beyond the damage area, and secure it with 2×4 lumber boards rolled into the edges and screwed into the roof deck for a firm, watertight hold.
Why not just use nails to secure the tarp?
Nailing tarps into undamaged areas creates new entry points for water long after the tarp comes down. Always use the sandwich board method with screws placed over the actual damaged zone instead.
Does emergency tarping help my insurance claim?
Yes. Prompt tarping shows your insurer that you acted quickly to minimize further damage, which supports a successful storm damage claim. Professional tarping with documented photos and a contractor report strengthens your case even further.
