


After a heavy storm rolls through Burlington or Greensboro, it doesn’t take long for a homeowner to spot the warning signs: curled shingles in the yard, dark water stains on the ceiling, or a suspicious wet patch near the chimney. Acting quickly matters, but acting correctly matters even more. Like-for-like shingle replacement without structural or deck changes is often treated as routine maintenance in many North Carolina jurisdictions, meaning no building permit is required. However, the moment structural work enters the picture, the rules change fast. This guide walks you through every step of the shingle replacement procedure so you can protect your home with confidence.
Table of Contents
- What to check before starting: Codes, permits, and safety
- Tools and materials you’ll need
- Step-by-step shingle replacement procedure
- Common mistakes, troubleshooting, and final inspection tips
- What most shingle replacement guides leave out
- Professional help for your North Carolina roofing needs
- Frequently asked questions
Key Takeaways
| Point | Details |
|---|---|
| Check permit requirements | In North Carolina, you typically don’t need a permit for shingle replacement unless you’re working on roof structure. |
| Prep safely and thoroughly | Assess roof condition, gather proper tools, and follow safety precautions before starting replacement. |
| Follow the correct procedure | Use a clear, step-by-step approach to remove, prep, and install shingles to ensure a lasting result. |
| Avoid common pitfalls | Watch for mistakes like missed leaks or poor fastening, which can lead to bigger issues. |
| Know when to call a pro | If you uncover decking or structural problems, or need an extra set of eyes, professional help is best. |
What to check before starting: Codes, permits, and safety
Before you lift a single shingle, it’s vital to be clear about regulations and preparation. Skipping this step is one of the most common mistakes homeowners make, and it can lead to fines, failed inspections, or voided insurance claims.
Understanding North Carolina permit requirements
North Carolina permits for roofing work depend heavily on the scope of your project. The general rule is straightforward: like-for-like shingle replacement does not require a building permit in many NC jurisdictions, as long as you are not touching the structural components underneath. If your project stays on the surface layer, removing old shingles and installing new ones in their place, you are typically in the clear without a permit.
The situation changes if you discover rotted decking, damaged rafters, or compromised sheathing underneath. Replacing or repairing those components triggers local permitting requirements in most North Carolina municipalities. Before starting, call your local building department or check online. What applies in Cary may differ slightly in Eden or Reidsville.
Important: Even when no permit is required, your work must still meet North Carolina building code standards. Code compliance is not optional simply because a permit isn’t pulled.
Pre-start inspection checklist
Walk through these items before you climb on the roof or order materials:
- Check the attic for any signs of moisture, dark staining, or daylight coming through the decking
- Look along the roofline from the ground for any sagging sections, which may indicate structural damage
- Inspect gutters and downspouts for granule buildup, a sign that shingles are aging and shedding their protective coating
- Note the pitch of your roof, because anything steeper than a 6:12 pitch requires additional fall protection equipment
- Confirm whether your homeowner’s insurance policy covers the damage before you spend money on materials
- Review any roof maintenance tips relevant to your specific roof type and age
Safety considerations you cannot ignore
Roof work is physically demanding and carries real risk. Before you get up there, take these precautions seriously. Wear rubber-soled boots with good grip. Set up OSHA-compliant fall protection if your roof pitch or height requires it. Work on dry days only, because wet shingles are extremely slippery. Never work alone. Have a second person on the ground to assist with materials and to call for help if needed.
Pro Tip: Check the weather forecast for a three-day window. You need at least two dry days to safely complete a shingle replacement without risking water intrusion on an open section of roof.
Tools and materials you’ll need
Once you’ve checked local codes and safety concerns, you’ll need the right tools and materials for the job. Showing up unprepared mid-project wastes time and can leave your roof exposed to the elements.
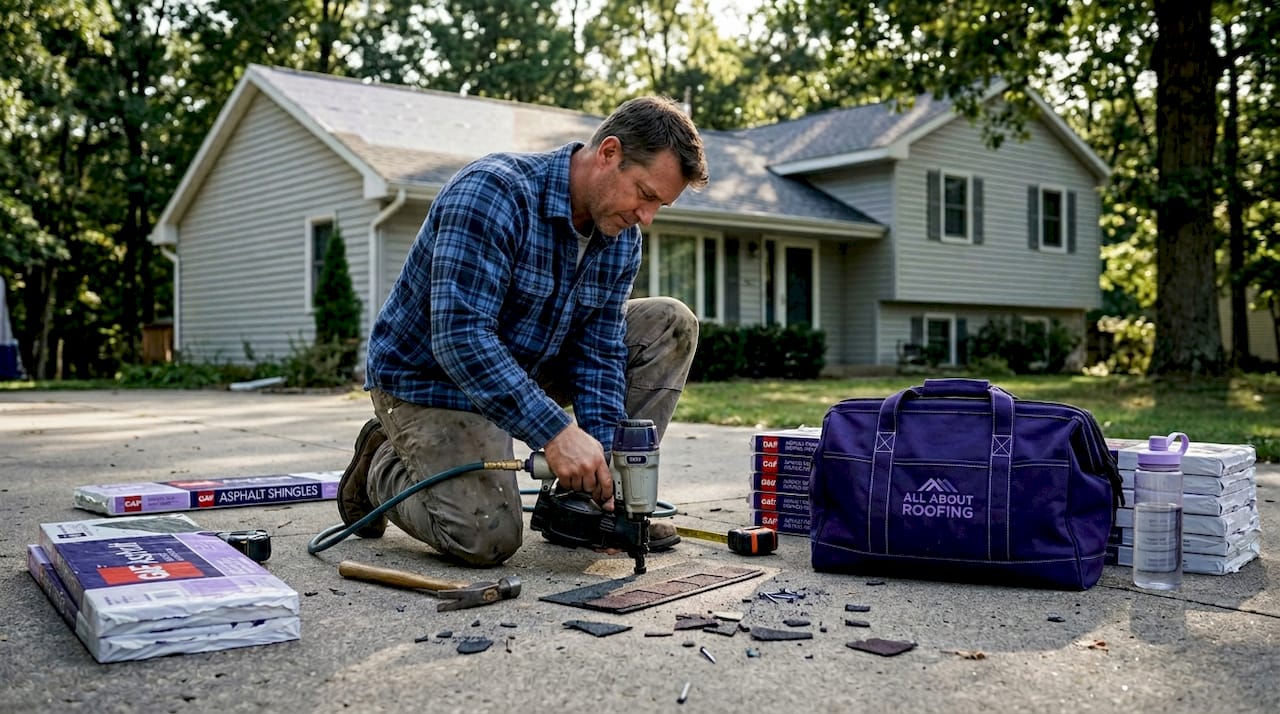
Complete tool and material checklist
| Item | Purpose | Notes |
|---|---|---|
| Roofing hammer or nail gun | Fastening new shingles | Hand-nailing is slower but more controlled for small repairs |
| Pry bar or flat bar | Removing old shingles and nails | Use a wide bar to avoid tearing underlayment |
| Utility knife | Cutting shingles to fit | Replace blades frequently for clean cuts |
| Chalk line | Keeping rows straight | Critical for a professional-looking result |
| Roofing nails (galvanized) | Securing shingles | Use correct length: 1.25 inch for standard shingles |
| Replacement shingles | Surface layer protection | Match existing shingles in color, weight, and style |
| Roofing felt or synthetic underlayment | Moisture barrier | Replace any torn sections before installing new shingles |
| Roofing cement or caulk | Sealing edges and flashings | Use roofing-specific products rated for exterior use |
| Ladder (stabilized) | Safe roof access | Use ladder standoffs to protect gutters |
| Safety harness and rope | Fall prevention | Required for steeper pitches |
| Drip edge (if needed) | Directing water away from fascia | Replace if bent or corroded |
Understanding types of shingles available is also important before you purchase materials. Architectural shingles, also called dimensional shingles, are heavier and more durable than basic three-tab shingles, and they carry longer manufacturer warranties. Matching your existing shingles in weight class, color, and brand ensures a consistent appearance and compatible wind ratings.
Pro Tip: Buy about 10% more shingles than your measured square footage requires. Cutting errors, mismatches, and breakage happen, and running out mid-job forces you to leave your roof exposed while you make another supply run.
Why fasteners matter more than most people think
Using the wrong nails is one of the most underestimated mistakes in DIY roofing. Smooth shank nails pull out more easily than ring-shank nails in high wind conditions. In North Carolina, where storms and hurricane-force winds can reach the Piedmont region, using ring-shank galvanized nails of the correct length is critical. Nails that are too short won’t penetrate the decking properly. Nails that are too long can split the decking or poke through the sheathing and create moisture paths. Note also that if scope of tool use escalates into structural changes during your project, you’ll need to reassess whether a permit is required at that point.
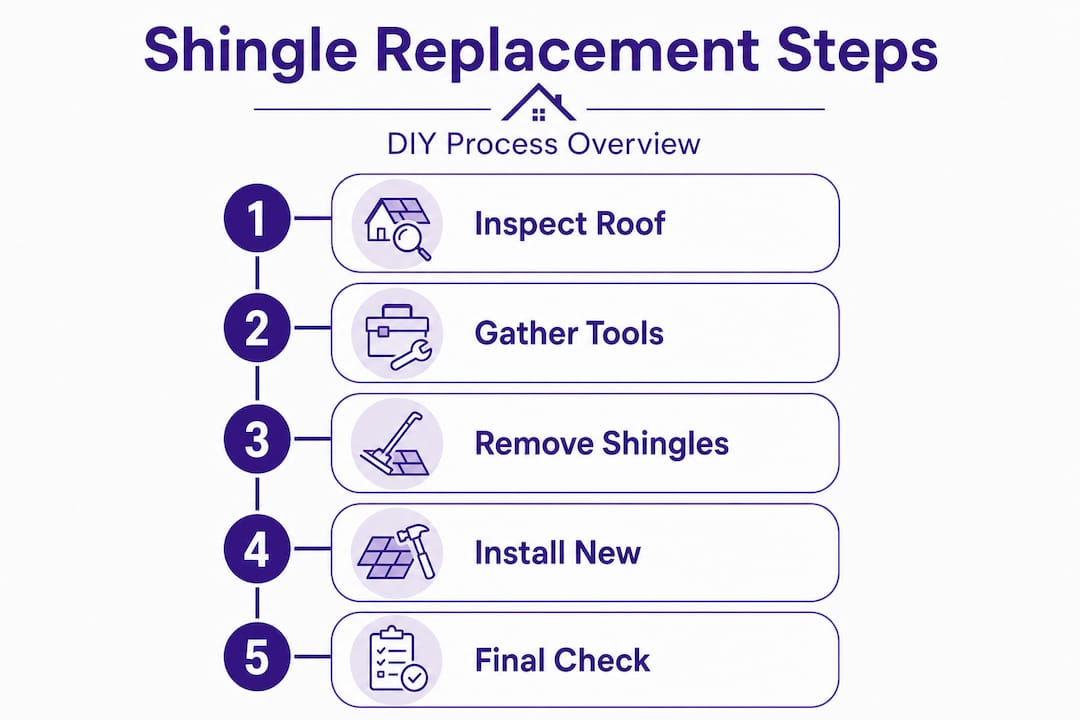
Step-by-step shingle replacement procedure
With tools and materials at the ready, here’s how to carry out each phase of your shingle replacement. Follow these steps carefully and in order.
-
Clear the work area. Remove any debris from the roof and ground below. Set up your ladder securely and position a materials lift or bucket if you’re working with a full bundle delivery.
-
Remove damaged shingles. Slide your pry bar under the edge of the damaged shingle and gently pop up the nails. Work from the top down to avoid breaking surrounding shingles. Remove all nails completely rather than bending them over.
-
Pull out remaining nails. Leftover nails cause bumps under new shingles and create leak points. Take your time here. A flat bar works well for pulling stubborn nails flush.
-
Inspect the underlayment and decking. Once the shingles are off, look at the felt or synthetic underlayment beneath. Small tears can be patched with roofing cement. Larger sections should be replaced. If the plywood decking shows signs of rot, soft spots, or cracking, stop and assess whether you now need a permit. Replacing shingles without disturbing underlying structure is typically considered maintenance, but decking repair crosses into structural territory.
-
Repair or replace underlayment. Patch any damaged sections or roll out new underlayment, overlapping edges by at least six inches and securing with roofing staples or cap nails. This layer is your backup defense against moisture.
-
Cut and stage your new shingles. Measure the area you’re replacing and cut shingles to size if needed. Stage them near your work zone on the roof so you’re not climbing up and down repeatedly.
-
Install starter shingles at the bottom course if needed. If you’re replacing a full section near the eave, install a starter strip first to seal the bottom edge against wind uplift.
-
Nail new shingles into place. Follow the manufacturer’s nailing pattern exactly. Typically, four nails per shingle placed just below the adhesive strip. Don’t nail too high (which leaves the nail exposed) or too low (which punctures the waterproofing zone of the shingle below).
-
Seal flashings and edges. Apply roofing cement around any flashings, vents, or chimney bases within your work area. Check that drip edges are secure and directing water into the gutter properly.
-
Check your work from the ground. Step back and look at the roofline from multiple angles. Shingles should lie flat with no lifting edges, consistent overlap, and no exposed nails or gaps.
DIY vs. hiring a professional: Quick comparison
| Factor | DIY | Professional |
|---|---|---|
| Cost | Lower material cost, your labor | Higher upfront, includes labor and warranty |
| Time | Full weekend or more | Often one day |
| Skill required | Moderate to high | Handled by trained crew |
| Permit navigation | Your responsibility | Managed by contractor |
| Risk of errors | Higher | Lower with experienced crew |
| Warranty coverage | Manufacturer only | Labor warranty plus manufacturer |
For ongoing roof care after installation, regular inspections twice a year keep small issues from turning into costly repairs.
Common mistakes, troubleshooting, and final inspection tips
After finishing your procedure, make sure to double-check your work and avoid common pitfalls. Many DIY jobs look fine from the ground but develop problems within weeks or months.
The most common DIY shingle replacement errors
- Nailing too high or too low. High nails become exposed when shingles flex. Low nails puncture the water-shedding zone of the shingle below. Both create leak points over time.
- Missing hidden deck damage. Soft spots in the decking can feel firm underfoot when dry but fail after the first rain. Press down on the decking as you work to feel for soft zones.
- Not replacing torn underlayment. Some homeowners patch over torn felt instead of replacing it. This shortcut fails quickly.
- Improper shingle alignment. Staggered joints are critical. If vertical seams line up between rows, water channels straight down and through the roof.
- Skipping roofing cement on flashings. Flashings around chimneys, vents, and skylights are the number one source of roof leaks. Never skip this step.
Note from our team: You do not need a permit when removing and replacing shingles without disturbing the underlying structure or plywood decking. But the moment you discover deck rot or structural damage, the project scope changes and you should contact your local building department immediately.
Troubleshooting common problems
If you notice a leak after completing your repair, trace the water path carefully. Water rarely enters exactly where it appears indoors. Check flashings first, then look for exposed nails, lifted edges, or gaps in your shingle alignment. For roofing troubleshooting advice specific to North Carolina weather patterns and common regional issues, our blog covers many common scenarios in detail.
Popped nails after a temperature swing are also common. Nails that weren’t driven flush can push back up through shingles as the roof expands and contracts with heat changes. Go back over your work after the first hot day and check for any raised nail heads.
Final inspection checklist
Before calling the job done, verify these items:
- No exposed nail heads anywhere on the repaired section
- All shingle edges lie flat with no lifting or curling
- Consistent overlap throughout, matching the surrounding roof pattern
- Flashings sealed and sitting tight against adjacent surfaces
- Gutters clear of excess granules or debris from your work
What most shingle replacement guides leave out
Most process-based guides give you the steps, but they don’t prepare you for what actually happens once you’re on the roof. We’ve been working with North Carolina homeowners for years, and there are a few things we see constantly that no checklist captures.
The biggest one is underlayment failure masquerading as shingle damage. Homeowners replace shingles, everything looks good, and then they get a leak after the next major rain. The shingles weren’t the real problem. The underlayment underneath was torn, brittle, or improperly lapped years ago. You can’t fully assess underlayment condition until the old shingles come off, and that’s when many DIY jobs discover they’ve taken on a larger project than expected.
The second thing guides skip is the true cost comparison. People assume DIY saves money. Sometimes it does. But when a DIY job leads to missed deck damage that rots through over six months, or when improper nailing voids a shingle manufacturer’s warranty, the final bill from our professional roof repair team is often larger than it would have been if we’d started the work from scratch. The savings on labor get erased fast when the repair becomes a replacement.
New homeowners also consistently underestimate how hard it is to spot deck damage before it’s severe. Decking that looks visually fine can have compromised structural integrity from moisture cycling over years. Experienced roofers know to feel for soft spots, check for discoloration patterns, and probe suspicious areas. That’s a skill that takes time to develop, not something you can read in a guide.
Our honest advice: if your shingle replacement project stays truly surface level, a motivated and careful homeowner can handle it. The moment you see soft spots, significant underlayment damage, or any structural concern, call a professional. The cost of getting it right the first time is almost always less than fixing a repair that went wrong.
Professional help for your North Carolina roofing needs
If you’re unsure or want peace of mind, professional support is always available. At All About Roofing Co., LLC, we make the process straightforward for homeowners across Burlington, Greensboro, Mebane, Hillsborough, and the surrounding communities.
Our team handles everything from single shingle repairs to complete roof replacement services, including permit navigation, decking assessment, and final quality checks. We also offer detailed roof inspections so you know exactly what your roof needs before committing to any work. Whether you’re confident doing the repair yourself or you’d rather let our shingle roofing experts handle it, we’re here to answer your questions. Contact us today for a free estimate and let’s get your roof back in shape before the next storm season.
Frequently asked questions
Do I need a permit to replace shingles on my roof in North Carolina?
In most North Carolina jurisdictions, you do not need a permit for a simple like-for-like shingle swap that doesn’t touch the roof’s structural components. Always verify with your local building department before starting.
When does shingle replacement require a building permit?
A building permit is typically required when your project involves structural changes beyond basic shingle replacement, such as repairing or replacing roof decking, rafters, or sheathing. Contact your municipal building office if you discover underlying damage during your repair.
What are the biggest mistakes homeowners make during DIY shingle replacement?
The most common errors include improper nail placement, overlooking hidden deck damage beneath the shingles, skipping underlayment repair, misaligning shingle rows so vertical seams line up, and failing to properly seal flashings around vents and chimneys.
How do I know if my shingle replacement was successful?
A successful shingle replacement leaves no exposed nail heads, ensures every shingle edge lies flat and sealed, maintains consistent overlap throughout the repaired section, and produces no active leaks or visible seams when examined from multiple angles on a dry day.
